

How to Heal Your Ink: Perfect Tattoo Aftercare Steps
Getting new ink is an incredibly exciting experience for anyone. You have spent hours choosing the perfect design and sitting through the pain. Now it is time to focus on the most important step of all.
Proper tattoo aftercare is what keeps that fresh design looking beautiful forever. Without a good healing routine your new artwork can fade or become infected. We are here to guide you through every single step of the process.
This comprehensive manual is designed specifically for first timers and seasoned enthusiasts alike. We will break down exactly what you need to do every single day. By the end of this page you will feel completely confident.
Your body views a fresh tattoo as an open wound. It requires immediate attention and ongoing protection to heal correctly. Understanding this simple fact changes how you approach the entire process.
Our skin is amazing at repairing itself when given the right tools. You just need to provide a clean environment and adequate moisture. The next few weeks are critical for the longevity of your artwork.
Before we dive into the daily steps you should gather your supplies. Being prepared means you will not have to rush to the store later. Make sure you have clean towels and unscented soap ready to go.
Why Tattoo Aftercare Is Completely Crucial
Many people mistakenly believe the artist is entirely responsible for the final result. The truth is that your actions at home matter just as much. Your artist can only do so much while you are in the chair.
Skipping your tattoo aftercare can lead to massive regrets down the road. Poor healing practices often result in patchy colors and blurry lines. In severe cases you might even deal with a painful infection.
Investing time into your healing routine protects your financial investment too. Tattoos are expensive and you want to get the best value possible. Taking care of your skin ensures your money was well spent.
We highly recommend reading about understanding tattoo pain levels to fully grasp the process. The pain of getting inked is temporary but the art is permanent. Protect it wisely so you can show it off with absolute pride.
Leaving the Shop with Your New Ink
Once your artist finishes their work they will clean the area thoroughly. They will then apply a protective bandage or clear wrap over the skin. This barrier keeps airborne bacteria away from your fresh wound.
Your artist will give you specific instructions on when to remove this bandage. You must listen to their professional advice above all else. They know their specific ink and techniques better than anyone.
Usually a traditional plastic wrap stays on for a few hours. If they use a modern adhesive bandage you might keep it on longer. Never remove the wrap early just because you want to look at it.
Your drive home is the beginning of the healing timeline. Keep these rules in mind:
- Keep the area protected from direct sunlight.
- Avoid touching dirty surfaces.
- Do not let your pets touch the wrapped area.
- The First Night of Healing Your Ink
Removing the initial bandage can be a slightly messy experience. You will likely see a mixture of blood and excess ink pooling underneath. This is completely normal and nothing to panic about.
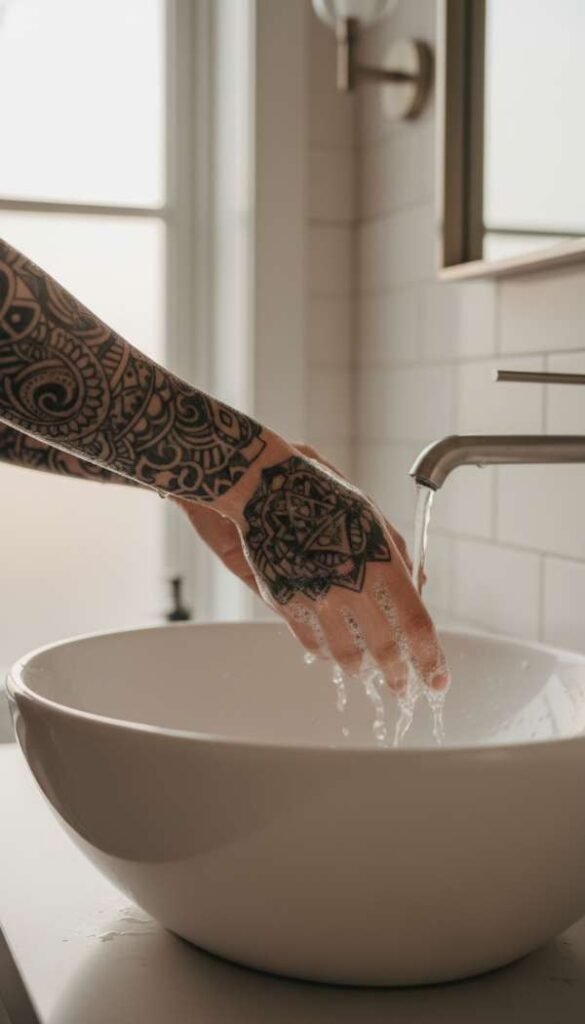
The first night of tattoo aftercare is often the most intimidating part. You need to wash the area gently but thoroughly before going to sleep. Make sure your hands are perfectly clean before touching the bare skin.
Use lukewarm water to gently rinse the slimy layer off your body. Do not use hot water because it will burn the sensitive skin. Cold water will close your pores and trap the excess fluids inside.
After washing you will need to dry the area completely. We will cover the exact washing and drying techniques in the next section. Your first night sets the stage for a smooth healing journey.
How to Wash Your Tattoo Correctly
A huge part of proper tattoo aftercare is keeping the area completely clean. You should only ever use a mild and unscented liquid antibacterial soap. Bar soaps can harbor nasty bacteria on their surface and should be avoided.
Gently rub the soapy water over your skin using only your bare fingers. Never use a washcloth or loofah on a healing design. Those rough textures will rip the delicate healing skin right off your body.
Make sure you wash away all the shiny plasma and extra ink. If plasma dries on the skin it creates very thick scabs. Thick scabs can pull the color out of your skin when they fall off.
Once the area is clean you must dry it with a paper towel. Gently pat the skin dry instead of rubbing it back and forth. Cloth towels hold millions of invisible bacteria and should never be used.
- Understanding the Peeling Phase
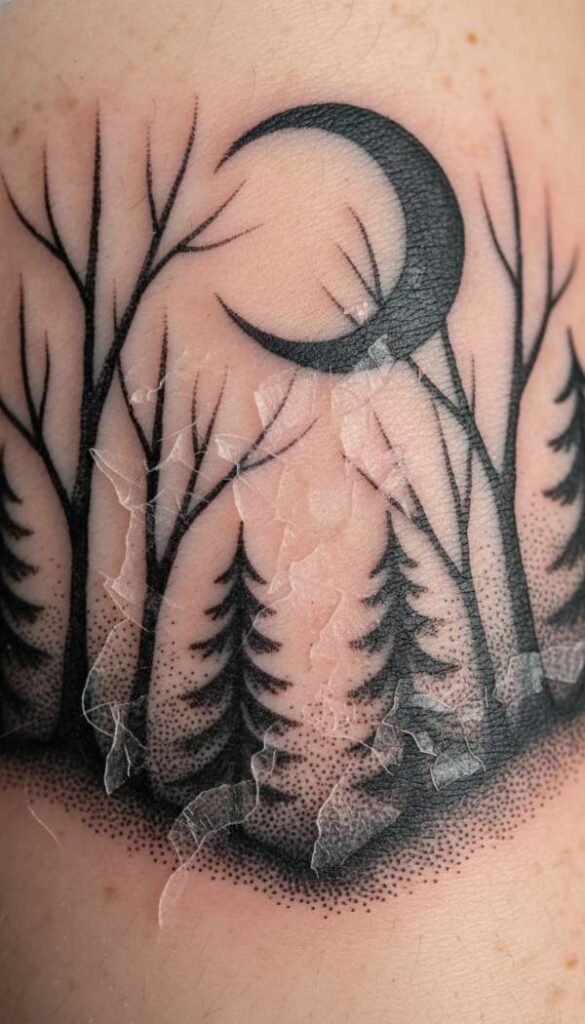
Around the fourth day your skin will begin to feel very tight. You will notice light flakes of skin starting to peel away. The peeling skin will actually match the colors of your new artwork.
This phase can be alarming for beginners who think their ink is falling out. Rest assured that only the top layer of dead epidermis is shedding. The permanent ink is locked safely beneath in the dermis layer.
During this time your skin will become incredibly itchy and annoying. You must resist the absolute strongest urges to scratch or pick at it. Scratching will easily pull out chunks of color and leave permanent blank spots.
If the itching becomes truly unbearable you can lightly slap the area. You can also apply a very thin layer of soothing moisturizer for relief. Staying hydrated by drinking water also helps your skin heal from the inside.
For more context on what to expect consider checking our guide on best tattoo styles for beginners. Different styles will peel in slightly different ways depending on the ink density. Heavy color packing always peels much thicker than simple line work.
Choosing the Right Ointment
Picking the right moisturizer will make your tattoo aftercare routine much easier. For the first few days a healing ointment is usually recommended. Aquaphor is an incredibly popular choice among professionals across the country.
You only need a tiny drop of ointment to cover the entire area. The layer should be so thin that it barely looks shiny. Smothering the skin in thick grease will clog your pores and cause breakouts.
After about three days you should switch to a lightweight unscented lotion. Lotions allow the skin to breathe much better during the peeling phase. Lubriderm and Cetaphil are excellent choices that you can find anywhere.
Avoid any products that contain strong fragrances or artificial colors. Aloe vera gels and petroleum jelly should also be strictly avoided. Always check the ingredients list before applying anything new to your body.
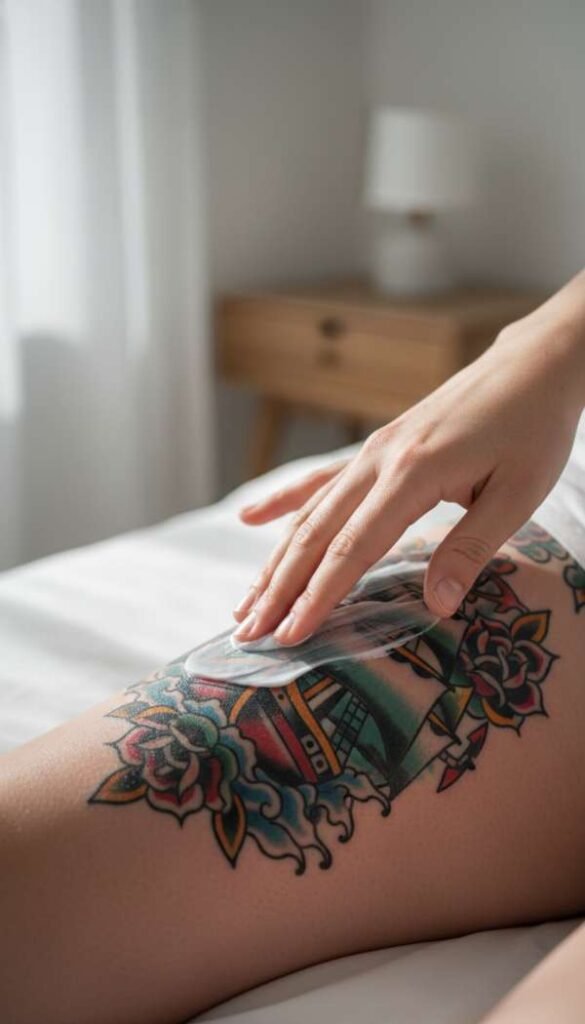
- Traditional Wrap versus Saniderm
Modern tattoo aftercare has evolved significantly in the last few years. Many artists now use a clear medical adhesive known as Saniderm or second skin. This amazing product completely seals the wound from dirt and water.
A clear adhesive bandage can usually be left on for up to five days. It traps your body fluids inside to create a perfect healing environment. You do not have to wash or moisturize the area while it is applied.
Traditional plastic wrap requires much more daily maintenance from the client. You have to wash and lotion the area several times a day. However traditional methods are better for people with severe adhesive allergies.
Talk to your artist about which method works best for your lifestyle. If you work in a dirty environment a sealed bandage is heavily preferred. Both methods yield beautiful results when followed correctly.
Common Tattoo Aftercare Mistakes to Avoid
Many beginners ruin their ink by making silly tattoo aftercare mistakes. The biggest error is exposing the fresh skin to direct bright sunlight. UV rays will literally blister the open wound and fade the bright pigments.
Another massive mistake is submerging the healing skin in water. You must avoid swimming pools and hot tubs for at least three full weeks. These bodies of water are filled with dangerous bacteria that cause horrible infections.
Wearing tight clothing over a fresh design is also a terrible idea. Tight fabrics will rub continuously against the skin and create massive irritation. The friction can literally rub the healing scabs right off your body.
You can read more about caring for your skin through the American Academy of Dermatology. They provide excellent medical advice for dealing with sensitive skin conditions. Listening to medical professionals is always a smart choice.
- Long Term Protection for Your Ink
Your tattoo aftercare journey does not end when the scabs fall off. The deeper layers of your tissue will take several months to completely regenerate. Your ink will look slightly milky or dull during this deep healing period.
Once the surface is completely healed you must follow these daily habits:
- Apply a high quality sunscreen every single day.
- Drink plenty of water to hydrate from the inside.
- Apply unscented lotion to keep the skin looking fresh.
Proper placement also plays a role in how well ink ages over time. Review our advice on choosing the perfect tattoo placement for future reference. Areas that see high friction will naturally fade much faster than protected areas.
What to Do if You Suspect an Infection
Being diligent with your tattoo aftercare usually prevents any scary infections. However you still need to know the warning signs just in case. Catching an infection early makes treating it significantly easier.
Watch out for these warning signs:
- Severe redness that spreads outward after a few days.
- The area feels extremely hot to the touch.
- Throbbing pain that gets worse instead of better.
- Pus oozing directly from the design.
Pus oozing from the design is an absolute emergency. Do not wait for things to get better on their own. You must contact a medical doctor immediately for professional antibiotics.
You can reference Healthline’s guide on skin healing for more detailed medical symptoms. Never ask the internet for medical advice when your health is at risk. Always trust a certified physician to handle real infections.
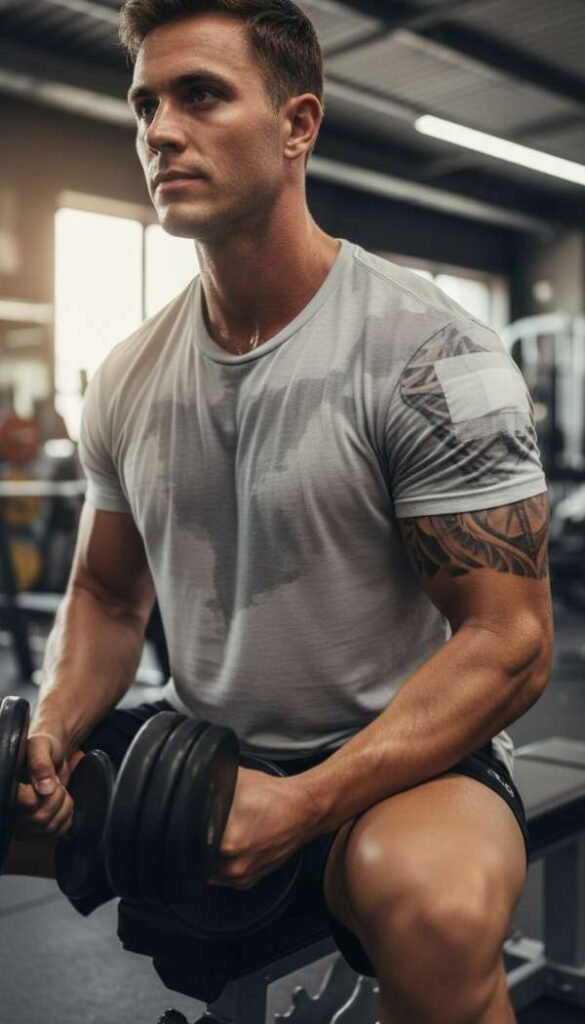
Working Out and Your Tattoo Aftercare Routine
Many fitness enthusiasts hate taking time off from their gym schedule. Unfortunately you really need to rest for at least forty eight hours. Heavy sweating can introduce bacteria directly into your open pores.
Gyms are notoriously dirty environments filled with dangerous staph bacteria. Laying a fresh design on a dirty gym bench is a recipe for disaster. If you must exercise you should stick to light walks outside.
When you do return to the gym wear loose cotton shirts. Clean the area immediately after you finish your workout session. Do not let stale sweat sit on the delicate healing skin.
Sleeping with a Fresh Tattoo
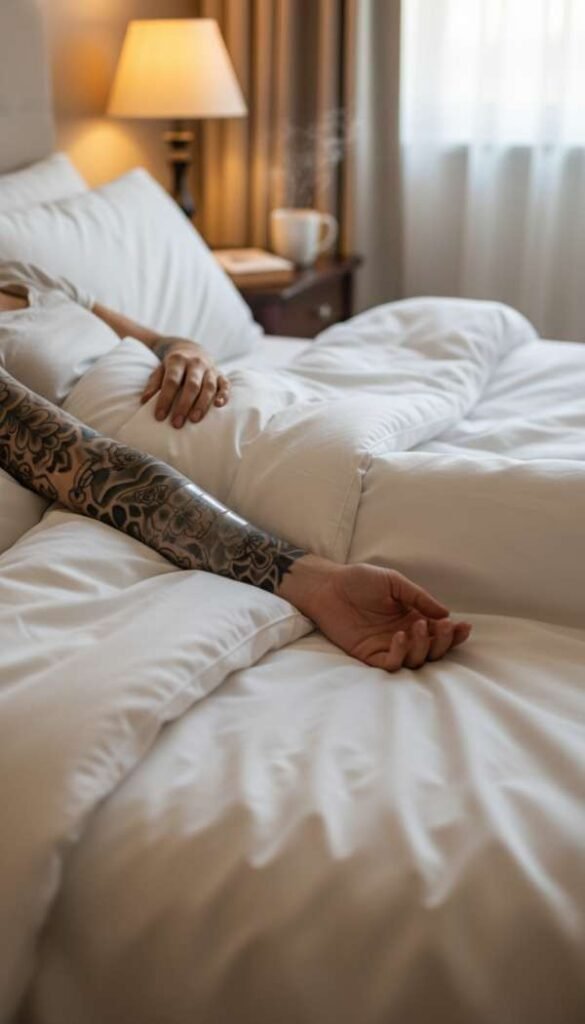
Good tattoo aftercare involves keeping your ink clean even while you sleep. You should wash your bed sheets right before your appointment. Sleeping on dirty sheets is a massive vector for unwanted bacteria.
If your healing skin sticks to the fabric overnight do not rip it off. Ripping the fabric will pull the ink straight out of your body. Instead you should gently wet the fabric with warm water until it releases.
Try to sleep in a position that does not put pressure on the area. If you got your back done you will need to become a stomach sleeper. It is slightly uncomfortable but it only lasts for a few nights.
Essential Tattoo Aftercare Products to Buy
Stocking up on the right tattoo aftercare items saves you unnecessary stress. You should buy:
- A fresh roll of high quality paper towels.
- An unscented antibacterial liquid soap with a pump.
- A reliable unscented moisturizer for the peeling phase.
Keep a travel sized tube of lotion with you when you leave the house. You never want to be caught at work with painfully dry and itchy skin. Staying moisturized on the go is extremely important.
Summary of the Healing Stages
We have summarized the entire tattoo aftercare timeline for your convenience below. Knowing what to expect makes the entire process much less stressful. You can use this chart to track your daily progress.
Here is a detailed breakdown of different styles and their unique features.
Tattoo Features Contract
| Tattoo Style | Typical Pain Level | Estimated Healing Time | Care Difficulty | Average Cost |
|---|---|---|---|---|
| Minimalist Line Art | Low | 1 to 2 weeks | Very Easy | Low |
| Traditional American | Medium | 2 to 3 weeks | Moderate | Medium |
| Large Watercolor | High | 3 to 4 weeks | High | High |
| Heavy Blackout | Extremely High | 4 to 5 weeks | Very High | Very High |
| Realism Portraits | High | 3 to 4 weeks | High | High |
Remember that everybody heals at a slightly different pace. Do not panic if your timeline does not match this chart exactly. Just keep the area clean and let your immune system do its job
Frequently Asked Questions
Thank you for reading our complete guide to perfect tattoo aftercare today. Following these strict guidelines ensures your body art will look flawless forever. We wish you the absolute best on your exciting new healing journey.
